
Bring Your Own Image
Creating instances with your custom VM image in the cloud.
There are several cloud providers out there which give you various cloud services from IaaS to SaaS. These days, everything in the cloud is a service which mostly proves to be very useful for various kinds of use cases. In this document we will attempt to lay out ways in which custom VM images can be created, and uploaded to Cloud Service Providers which can then be used to create virtual machine instances on their platform. The specific issue I was facing with the ENPM634 class is that the VMs that are given to the students can only be run on x86_64 systems. Since I have an M1 Mac which is ARM based, there is only one other option, which is to upload the image to the cloud and boot it there so that it can be used as the course demands.
Here is a summary of the steps that we will be following:
1. Getting hold of the `.ova` files.
2. Unpacking the `.ova` file to get the `.vmdk` file.
3. Converting the `.vmdk` file to `.qcow2` the file format.
4. Uploading the `.qcow2`a file to a Digital Ocean Space (like an S3 bucket).
5. Creating a Digital Ocean Droplet with a custom image.
6. Accessing & Fixing the Droplet from the inside.
7. Security fixes to save money.
Step One — OVA Files
Get hold of your `ENPM634-Ubuntu.ova` file from the shared google drive folder and open a new terminal window to kick things off. I would recommend creating a new working directory to keep things organized. This is completely your choice. I am doing it to keep my OCD demons at bay.
The commands listed below are going to unpack the OVA file, get the VMDK file from it, and then convert that VMDK file to the QCOW2 file format. A little research on my end shows that most cloud providers except the QCOW2 file format for uploading VM images. This format creates smaller file sizes compared to the `.img` format, which for me blurted out a 20 GB file that I was not able to upload anywhere.
# Optional:
mkdir OVA && mv ~/Downloads/ENPM634-Ubuntu.ova ./OVA

# Unpack the OVA
tar -xvf ./ENPM634-Ubuntu.ova

# Convert the VMDK File to QCOW2 File
sudo apt update && sudo apt upgrade -y && sudo apt get qemu-utils -y
# gets the QEMU package for file conversion

qemu-img convert -f vmdk -O qcow2 ENPM634-Ubuntu.vmdk MyUbuntu.qcow2
Step Two — Digital Ocean Object Storage
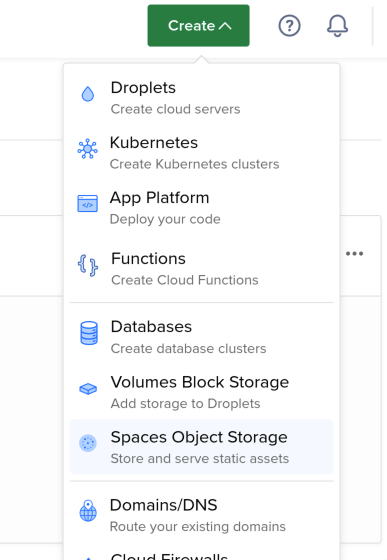
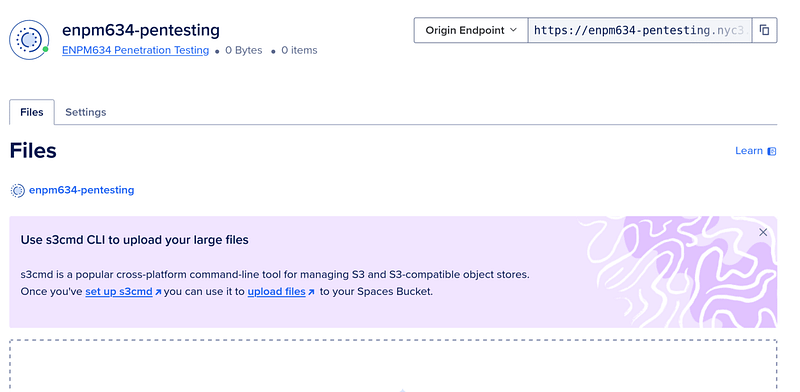
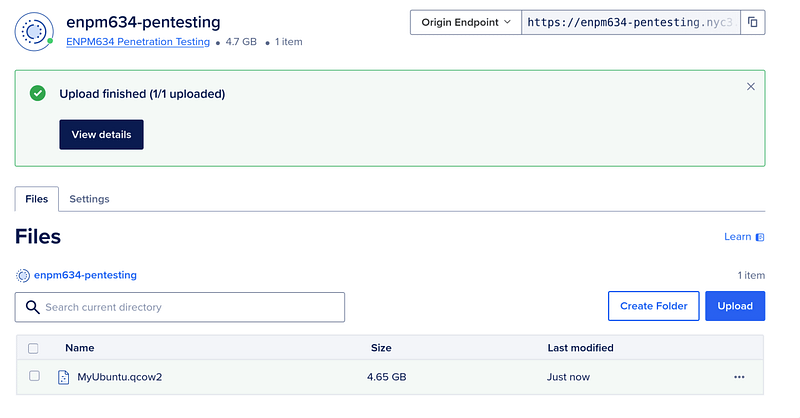
Once the image is ready to be uploaded, get yourself a Digital Ocean account and create a new project. In this project create a new “Space” which is equivalent to an AWS S3 bucket. Once this space is created, you can go ahead an upload the `MyUbuntu.qcow2` file on this space.
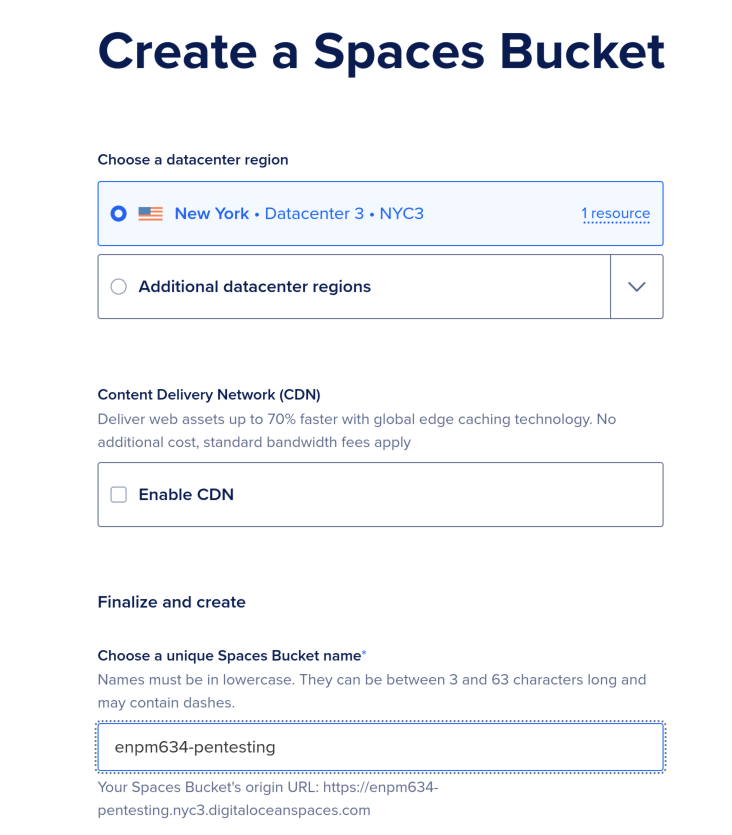
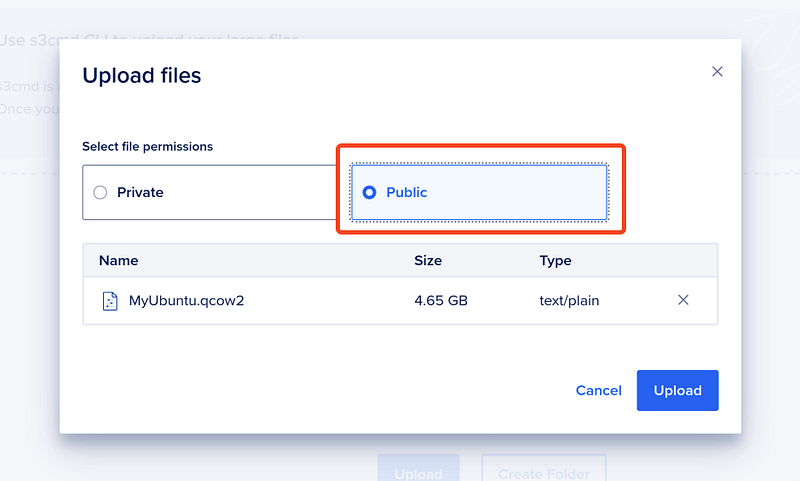

Make sure you keep the bucket “Public” so that any resource on the internet can access it. Don’t worry, we are going to destroy this bucket after we’ve used the QCOW2 file to create a custom VM image.
Step Three — Digital Ocean Droplet
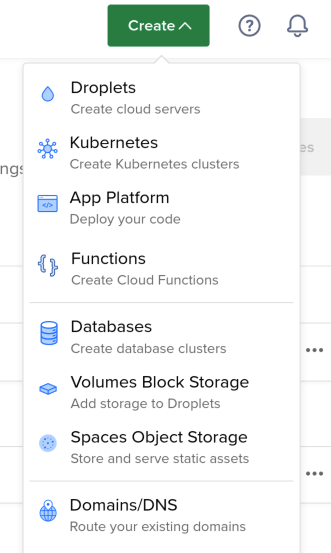
The next step is to create a new Digital Ocean Droplet using our custom VM image — `MyUbuntu.qcow2`:
- Click on the dropdown to create a new Droplet.
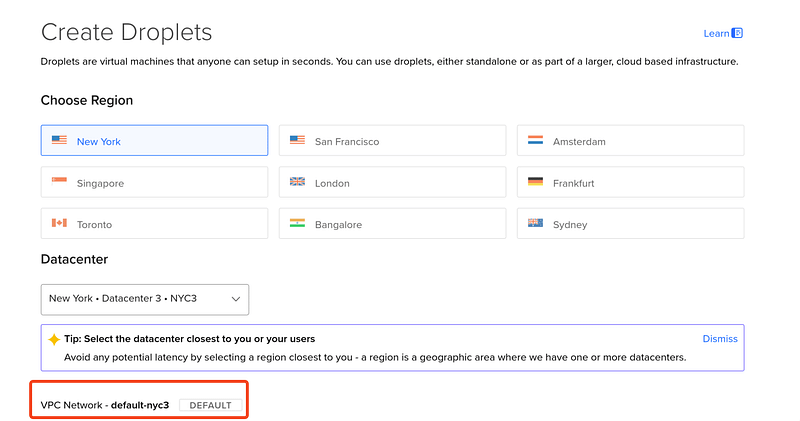
- Select the same Datacenter Region as your Spaces bucket — NYC3 in my case.
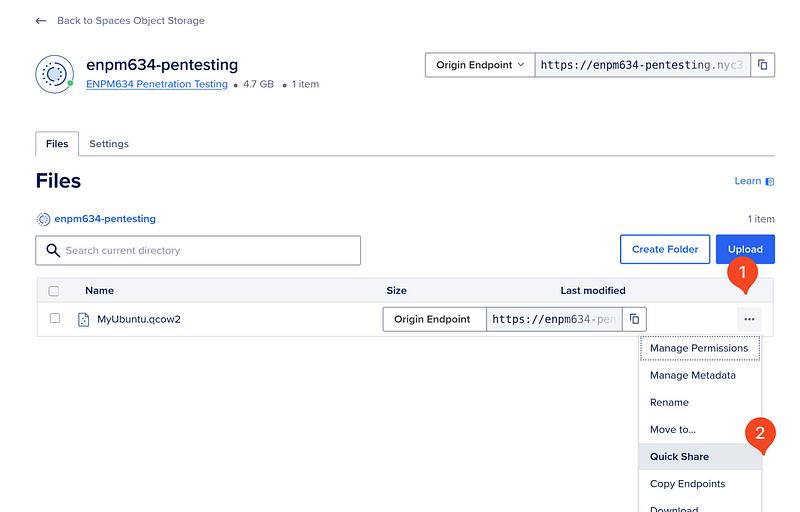
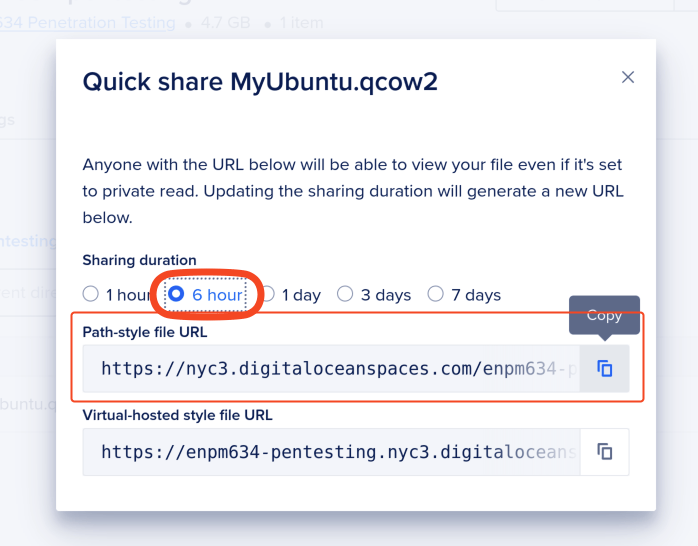
- Get the link for the image from the Spaces bucket and save it somewhere.
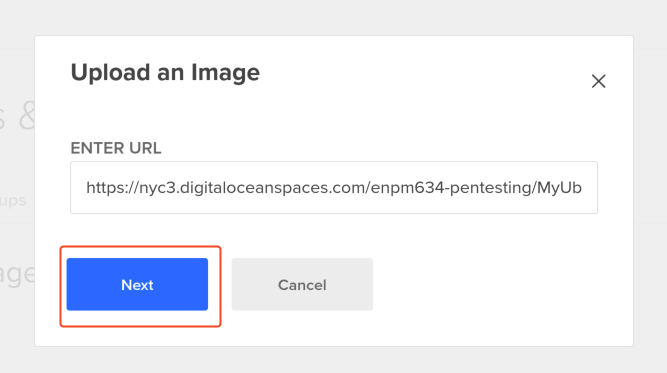
- Click on “Custom” to upload a custom VM image. Copy and paste the location of the QCOW2 file in this prompt.
- Let it brew until the “pending” message goes away.
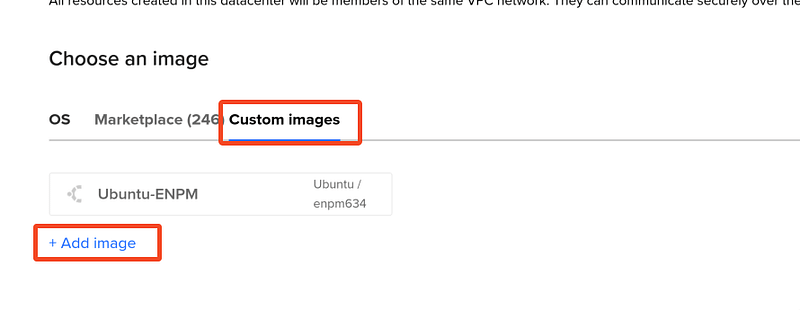

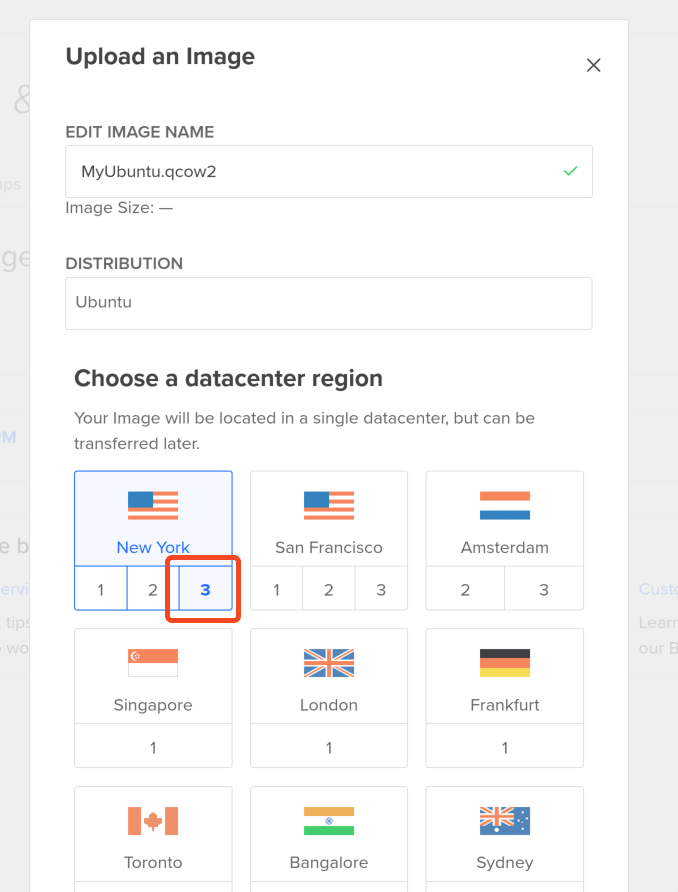

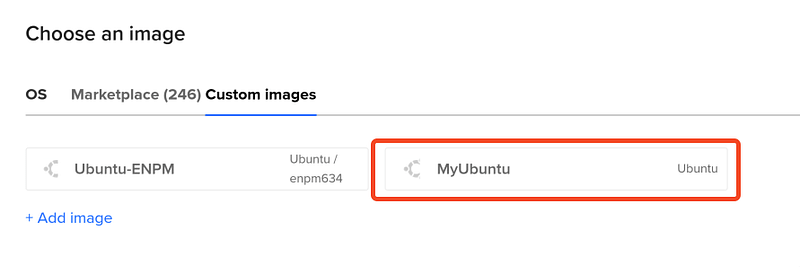
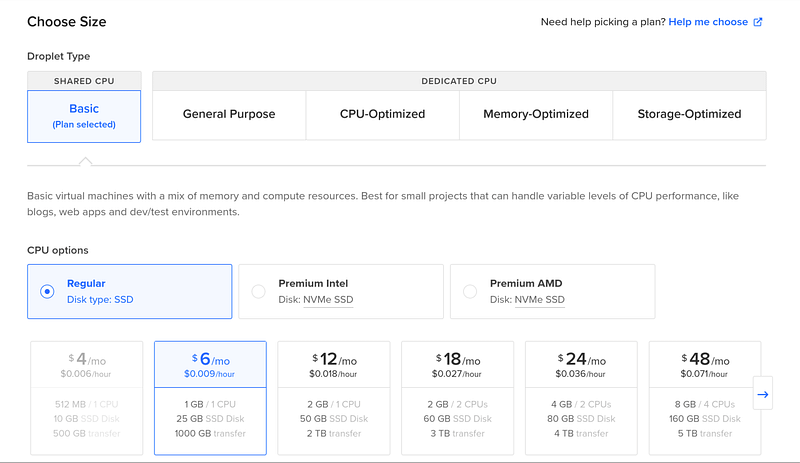
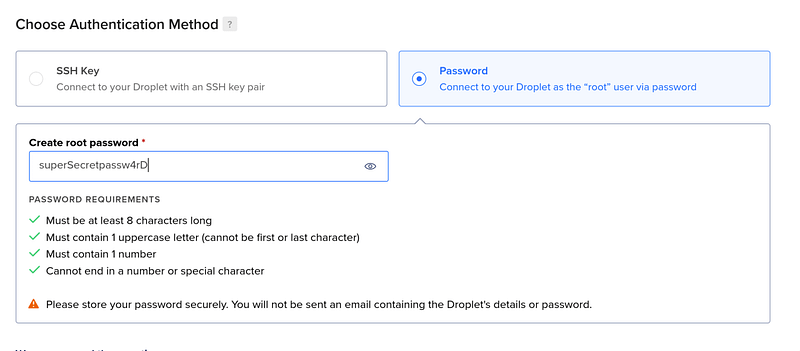
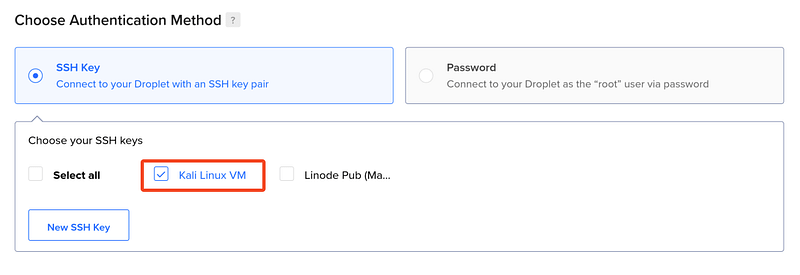
Once the image is ready, go back to the “Create Droplet” menu, select your region as NYC3 for those who are following along and click on the custom image button. The new Ubuntu image should be waiting here all set for success. Make other configuration changes as shown in the figures below and you should be fine. For “Authentication” you can definitely use an SSH key, which is the way I would recommend you do things, but to keep things simple here, let’s not go there. In any case, there is an “OPTIONAL” section at the end of this document that will guide you on setting up and using SSH keys for your VM in the cloud.
All we need to do now is finalize changes and create the droplet.
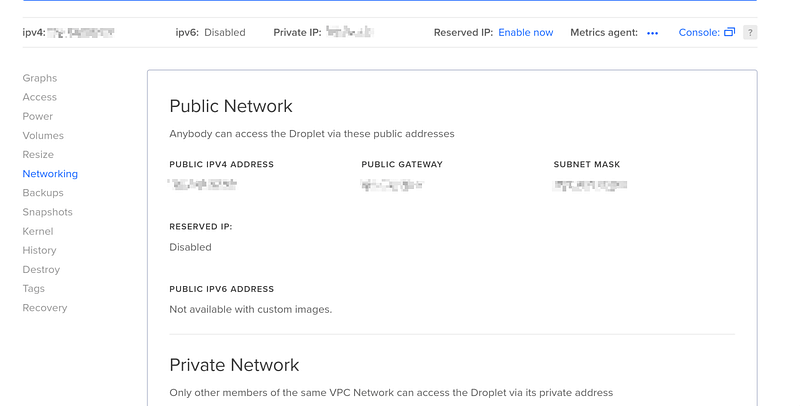
Step Four — GOD!! WHERE IS THE INTERNET?!
Phew! That was a lot, but we made it. Well almost…
You know when things are going well, and life throws curveballs? Well this was just a moment like that for me. The droplet has successfully been created but since it is a custom image, it is YOUR job to make it connect to the internet. As you might already have noticed, SSH-ing into this droplet is not possible, neither is pinging. Commands like `curl google.com` do not show any output.

Let’s get some internet shall we?
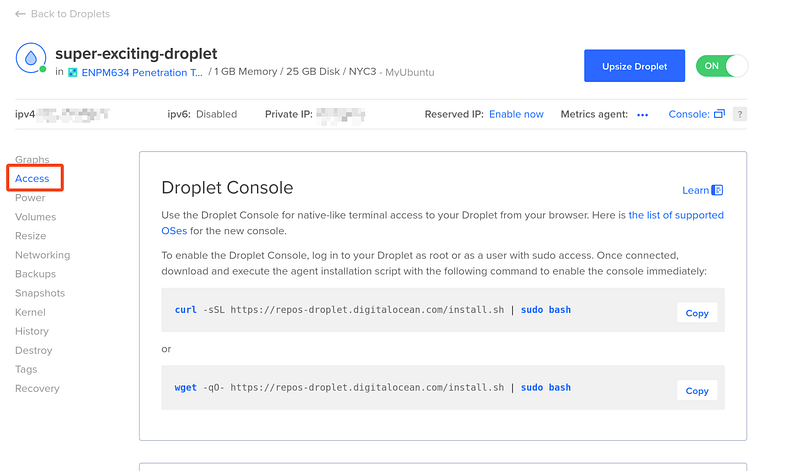
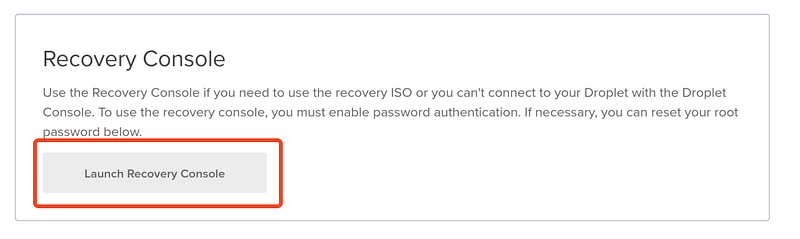
Start by going to the “Access” section of the Droplet and scrolling down to “Launch Recovery Console”. This will give you access to the console via Digital Ocean’s proprietary connection method which is like sitting next to the server that your VM is loaded into. However, let’s not get nerdy right now. For this specific VM, the students of UMD have already been furnished with the ID and Passphrase they need to login. Enter those credentials and you will have a temporary shell to do some voodoo-magic.
Overview
We will do the following:
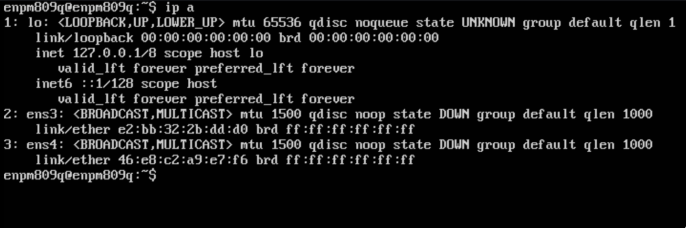
1. Check the current network interface names (ens3 & ens4 in this case.)
2. We will edit the `/etc/network/interfaces` file and add those interfaces.
3. Restart the networks service daemon.
4. Reboot the system (optional).
List of Commands
# Run things as root
sudo su

# Check the network interfaces
ip a

# Edit the network interfaces file as shown in the next section
vim /etc/network/interfaces

# Save changes and quit
# Restart the networking service...
sudo systemctl restart networking.service

# Check if it worked.
ping -c 2 google.com
Editing the Interfaces File
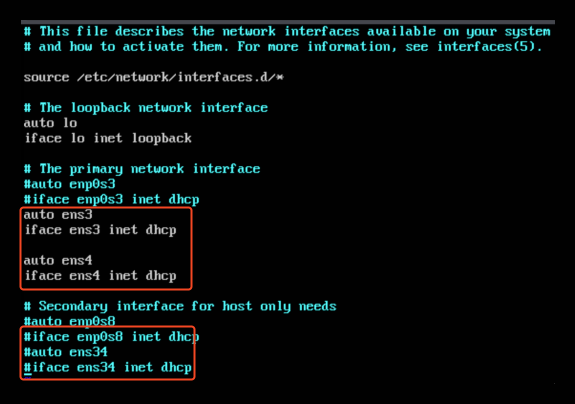
Below are screenshots of the changes that you need to make. The first figure shows the current network interfaces — `ens3` & `ens4`. The figure below that, shows the interfaces file open in a text editor (vim).
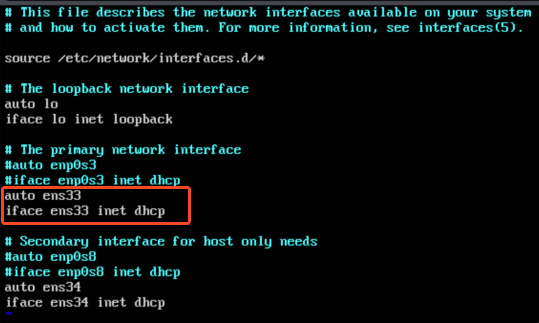
Now we need to edit specific sections of this file to tell the operating system which interfaces to look for, and what to do with them. We are going to use DHCP (Dynamic Host Allocation Protocol) to keep things simple.
auto ens3
iface ens3 inet dhcp

auto ens4
iface ens4 inet dhcp
After adding these two lines, comment out the last two lines of the file. We do this because `ens34` does not exist on this system.
Voila! You can now try to ping google, and it should work. Just restart the network service on your system using:
sudo systemctl restart networking.service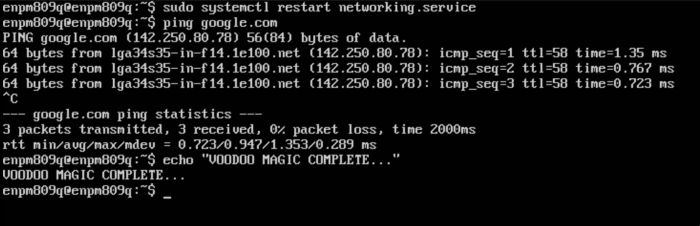
Step Five — Security Considerations
Parts of this tutorial are very specific to candidates taking the ENPM634 — Penetration Testing class at the University of Maryland. Which is why we also know that this specific Droplet, created from the `ENPM634-Ubuntu.ova` file is an extremely vulnerable Ubuntu 16.04 virtual machine. It is very easy for people to hack into this system and use it for “Crypto Mining” which is what I saw happen to my Droplet. I quickly deleted the Droplet before I get charged for using extensive resources on Digital Ocean.
It is with this caution that I VERY STRONGLY RECOMMEND that you create a firewall rule, that will only allow YOU to connect to your Droplet. It only take a couple of minutes to create this firewall and is not at all a hassle. So let’s do this final thing, after which both you and I can get some well deserved shut-eye. Grab your coffee!
Overview
- Know the public IPv4 address for the network you are using.
- Get your CCNA certification.
- Create a new Digital Ocean firewall.
- Add TCP/UDP inbound rules.
- Add TCP/UDP outbound rules.
To get your IPv4 you can use this nifty little command I have created. You can also alias it to something and put it in your ZSHRC file to always get your public IP by snapping your fingers:
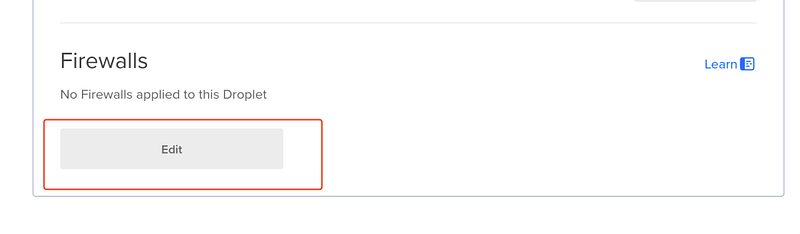
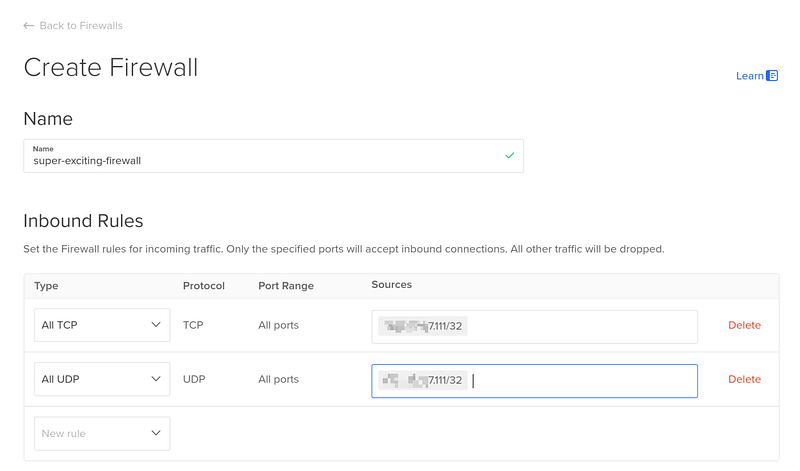
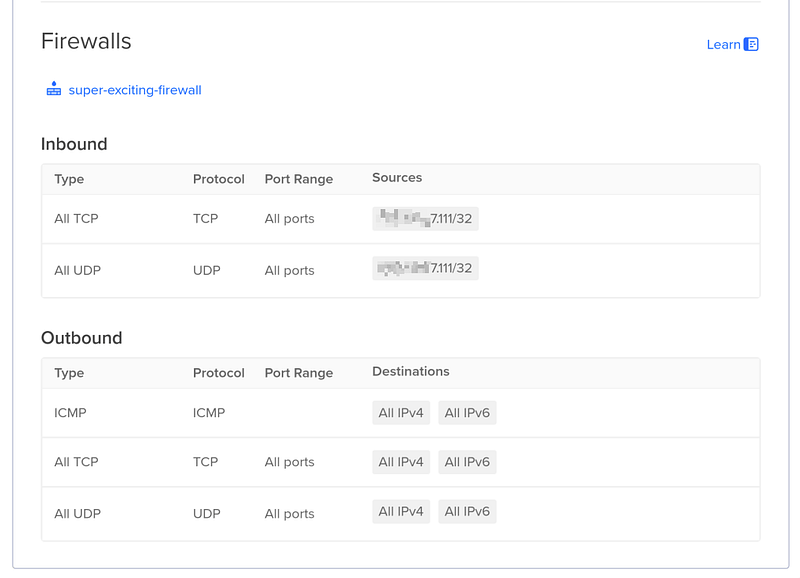
host myip.opendns.com resolver1.opendns.com | grep -oE '\b([0-9]{1,3}\.){3}[0-9]{1,3}\b' | awk 'NR==2'Once you have your public IP head over to your Droplet and click on Networking & scroll down to firewall. Here, create a new firewall and start adding inbound and outbound rules. Let’s say your IP is `222.222.222.110`. To only allow this IP to connect to your instance, add an inbound rule that allows all TCP, UDP and ICMP packets originating from `222.222.222.110/32`. Follow the screenshots that follow, for setting up the firewall this way.

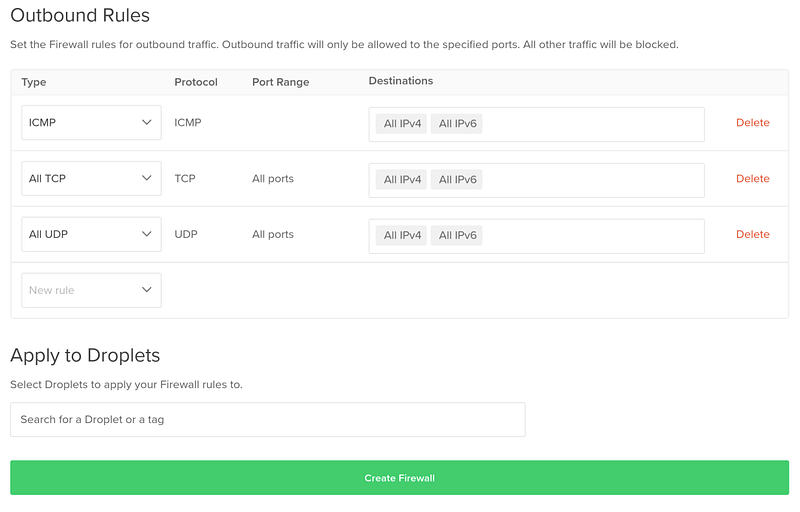
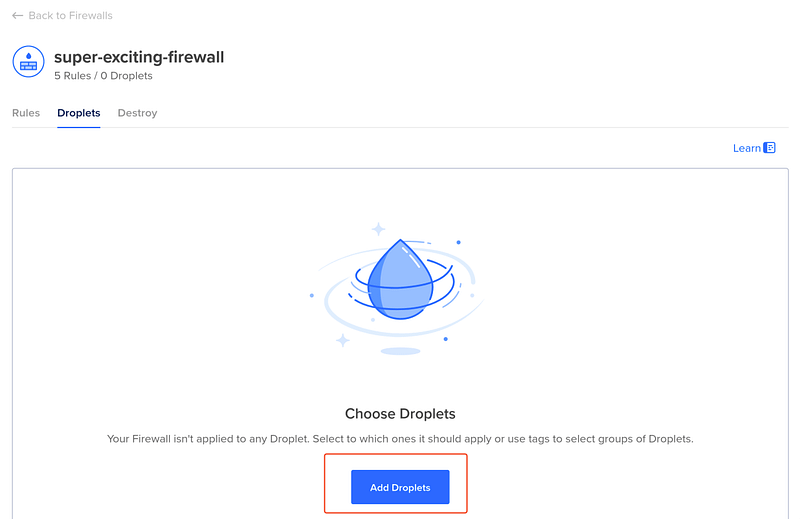
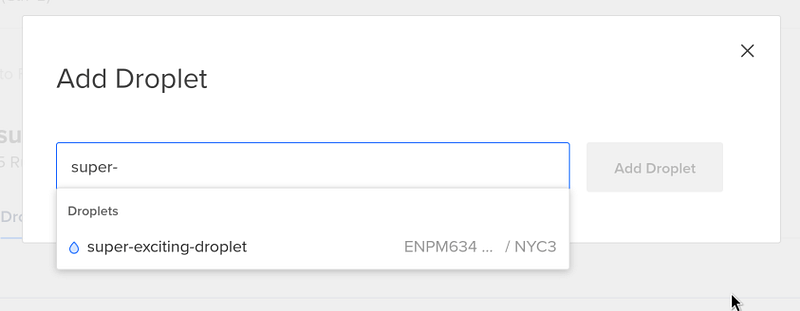
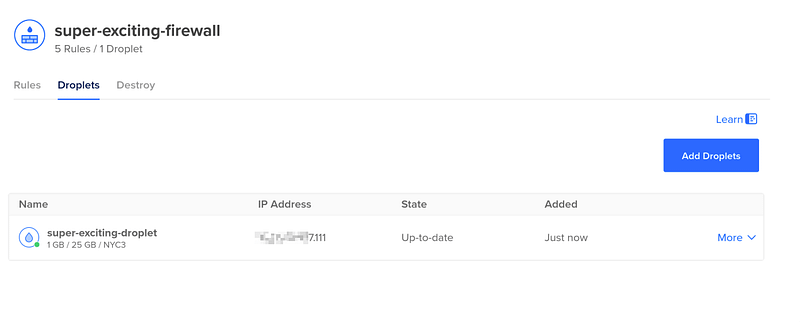
Now all we have to do is apply this firewall to our new Droplet which will filter the necessary packets.
Check if your firewall is working by pinging the system, or in this very specific case, performing an NMAP scan to see if the computer can reach it:
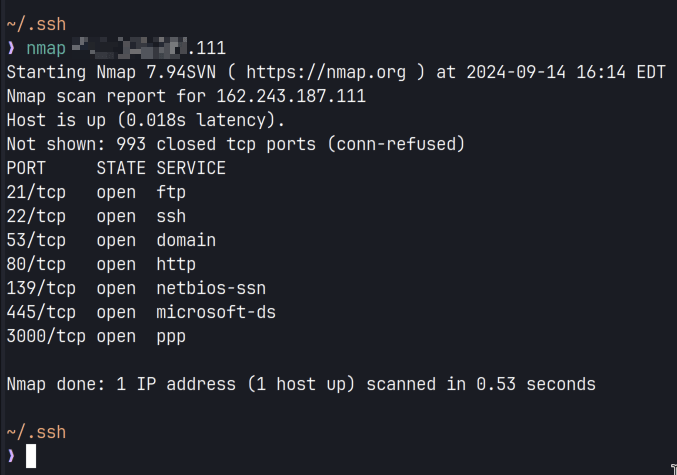
Great. It works!
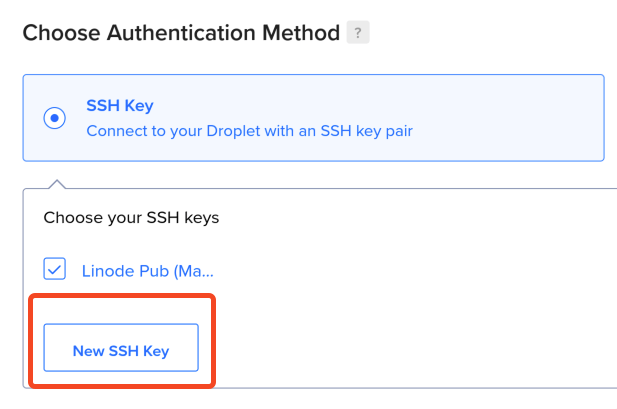
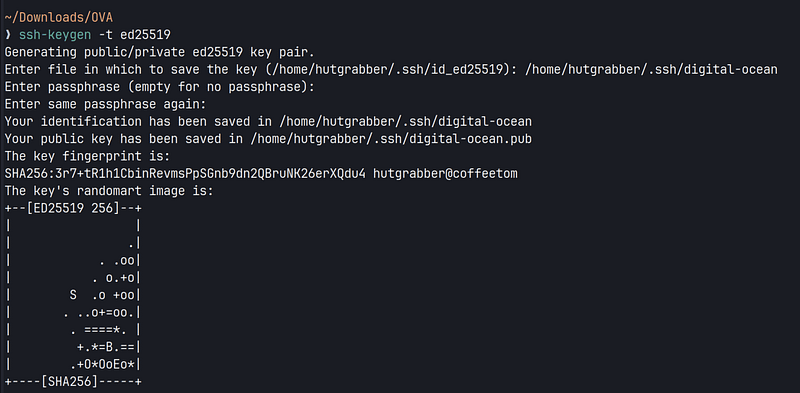
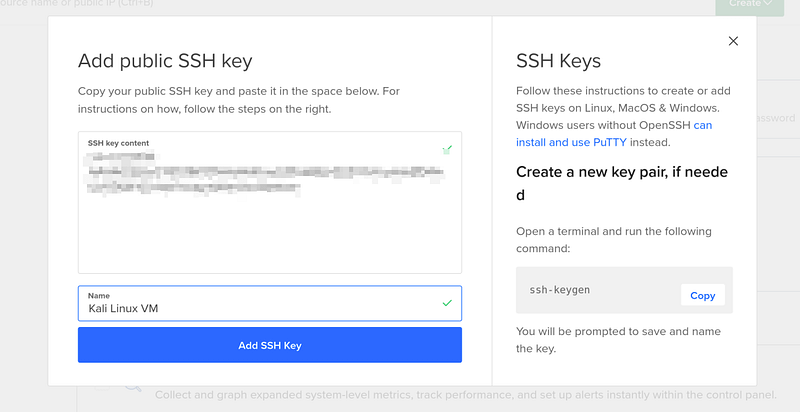
Bonus Section — Creating an SSH Key
For creating an SSH key to connect to any cloud instance, you just need to do the following:
1. Create a new ssh key using the algorithm of your choice.
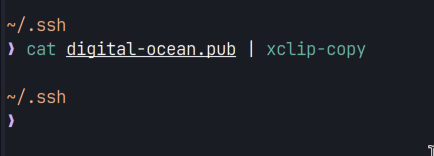
2. Copying and pasting the public key into the Digital Ocean console.
3. Using the key along with your SSH command instead of your password.

Finally…
In conclusion, navigating the complexities of cloud computing and virtual machine management can seem daunting, especially for those using ARM-based systems like the M1 Mac. However, by following the outlined steps — from obtaining your .ova files to successfully deploying a custom VM image on Digital Ocean—you can overcome these challenges effectively.
Member discussion